Tuesday, December 22, 2015

Seamless Crochet Ear Flap Hat


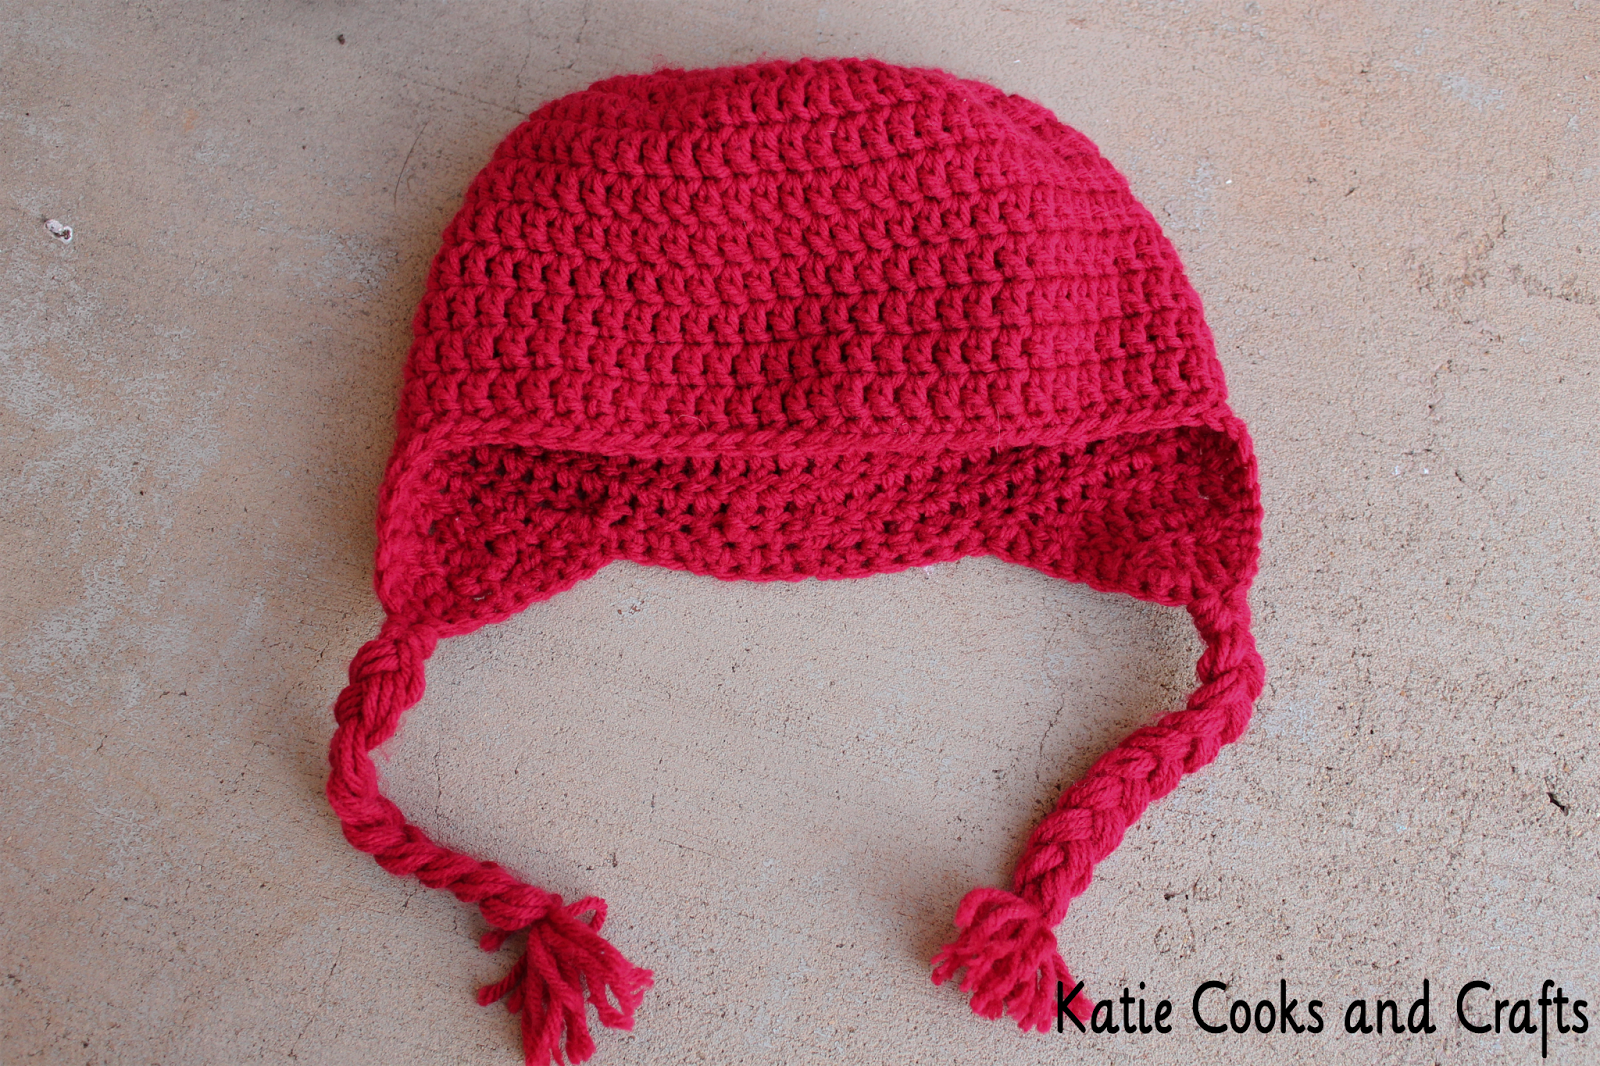
This is a simple double crochet beanie hat with ear flaps.  This hat is worked in a continuous spiral so there is no seam.  This hat can be a regular beanie or add optional ear flaps.


Seamless Crochet Ear Flap Hat

This pattern is written in US crochet terms.  I used worsted weight yarn and a size H crochet hook.  You will also need a measuring tape or ruler, scissors and a yarn needle to hide your ends.  You will need about 3 ounces of yarn


Notes: Think of this hat in 2 parts (3 parts if you are adding ear flaps). Part 1 is the crown or top of the hat, part 2 is the sides, and optional part 3 is the ear flaps. The crown is a flat disc or slightly cupping disc. With each round the disc will grow wider and wider. Once the crown is as wide as you need it for the size you are making, then you will skip to part 2, the sides of the hat. Part 2 is just 1dc in each st. Continue with part 2 until the hat is as long as you like. For a beanie you will want the hat to hit you around the earlobes or make it longer for a slouchy style or if you will roll the brim up. For an ear flap hat you will want to make your beanie a bit shorter, having it end near the middle of the ear. If you make your ear flap hat too long is will fall over the eyes.


Part 1 
The crown of the hat (this will be a flat or slightly cupping disc)
Begin with a magic loop
  1. Work 1 sc (mark this stitch), 1 hdc, 10 dc into the magic loop (working over the loop and the short tail). Pull the short tail to tighten the magic loop (12 stitches)
  2. Work 2 dc in each st around (be sure to move the stitch marker from the last round to the first dc of the new round for every round) (24 stitches)
  3. *Work 2 dc in the next st, then 1 dc in the next st, repeat from * around 11 more times (36 st)
  4. *Work 2 dc in the next st, then 1 dc in the next 2 st, repeat from * around 11 more times (48 st)
  5. *Work 2 dc in the next st, then 1 dc in the next 3 st, repeat from * around 11 more times (60 st)
  6. *Work 2 dc in the next st, then 1 dc in the next 4 st, repeat from * around 11 more times (72 st)
Can you see how this pattern continues? You will always increase by 12 stitches on each round.
The next row would be

  1. *Work 2 dc in the next st, then 1 dc in the next 5 st, repeat from * around 11 more times (84)
Continue until your disc is large enough. Below is a guideline but you can make the crown any size that you want. You do not have to finish a round, you can stop at any point once your disc is the appropriate size. Keep in mind that tightly crocheted hats will have less stretch and loosely crocheted hats will have more give to them

Diameter of hat crown (inches)
Baby : 4-5 inches
Toddler : 5-6 inches
Teen/Adult : 6-7 inches

Part 2 
The sides of the hat

Once the crown is the appropriate size you will continue working dc in a spiraling fashion. Using a stitch marker is no longer needed. You will no longer be increasing and instead of the disc growing wide and wider the disc will begin to cup and the sides of the hat will be formed.

  1. 1 dc in the next st and in each stith around until the hat is as long as you like.
  2. Once the hat is as long as you like you will need to taper down and fasten off. To do that you will work 1 hdc in the next 3 st, then 1 sc in the next 3 st, then 1 sl st in the next st, fasten off


Part 3 
The ear flaps (optional)
Turn the hat so that the tapering decrease at the end of Part 2 is at the center back, this will help make it less noticeable. You will want to make the location of the earflaps. You can put the hat and make where the ear flaps would need to be to cover the ears, or if that is not possible you will need to estimate. The ear flaps should be slightly set back from center, as this is how your ears are slightly set back.

  1. Join the yarn on at the mark where the ear flap starts. To join on you will pinch the new yarn with a spare finger onto the backside of your work (the inside of the hat), insert your hook into the appropriate stitch on the hat, pick up the yarn and pull it through the stitch. Ch 1 and pull on the short tail to snug that ch down and help hold the new yarn on. You will need to continue to hold the yarn on the backside of your work for several stitches until it is secure.
  2. Ch 1, starting in the stitch that you joined the yarn on to, dc2tog, dc in the next 6 st, dc2tog over the next 2 st, ch 1 turn your work
      To do dc2tog: yo, insert your hook, yo and pull up a loop, yo and pull through 2 loops on your hook, yo, insert your hook into the next st, yo and pull up a loop, yo through 2 loops, yo and pull through all 3 loops on your hook
  3. dc2tog, dc in the next 6 st, dc2tog over the next 2 st, ch 1 turn
  4. dc2tog, dc in the next 4 st, dc2tog over the next 2 st, ch 1 turn
  5. dc2tog, dc in the next 2 st, dc2tog over the next 2 st, ch 1 turn
  6. dc2tog twice, fasten off


To finish: work a border of sc, work 1 sc into each stitch along the bottom edge of the hat and work 1-2 sc into the sides of each row of the ear flaps. More or less stitches may be needed for the sc border to lay flat and look smooth. Hide all the ends of the yarn with a tapestry or yarn needle. Add any embelishements you like such as pom pom, tassels or braids to the ear flaps and/or a pom pom to the top of the hat.

This pattern, tutorial and video are my own creation.  Please link back to this original patterns or video when sharing.  Be sure you check out all of my free crochet patterns.


Thursday, December 17, 2015

Easy No Seam Thumbless Baby Mittens ~ No Scratch Mits


These mittens are very similar to the Spiral Baby Mittens only worked in a single color.
This pattern is written in US crochet terms.  I used acrylic worsted weight yard and a size H crochet hook.  You will only need a small amount, about 2 ounces total

  1. Ch 4, working into the top loop only,  2 sc in 2nd ch from the hook, 1 sc in top loop of next ch, 2 sc in top loop of next ch\
  2. Turn your work upside down, working into the other loop of the foundation chain, 2 sc in the other loop of the st you just worked into, 1 sc into the other loop of the next st, 2 sc in the other loop of the last st
  3. Now you will be working under both loops on each stitch as usual. You will not join round with a sl st and you will not turn your work. Place 2 sc in the first sc (this will count as your first increase on this short end, the 2nd increase will occur once you have gone all the way around), then 1 sc in each of the next 3 stitches down the long side, 2 sc in the next 2 sc (here are the 2 increases for this short end), 1 sc in each sc going down the long side
  4. Continue spiraling around, increasing by 2 stitches on the short ends, until you have 20 stitches around  You will end with just 1 increase (the first increase was already completed at the beginning of that round)
  5. Once you have 20 st you will not longer be increasing on the short ends. Place 1 sc in each stitch. Continue spiraling until the mitten measures 3 inches long (for 0-6 month size) or 3.5 inches (6-12 month size)
  6. Next you will work one row of eyelets to lace the drawstring through. To make this row you will *ch 1, skip 1 st, 1 hdc in next st, repeat from * around until you have 10 holes. The 1st and 10th hole will end up on different rows, this is expected and the nature of spiral crochet. Once the drawstring is in it will not be noticeable.
  7.  Work 2 sc into the ch 1 space.
  8. Now continue sc in each st for 3-4 more rows to make a cuff. Add an increase to the short ends of each row of the cuff to flare it out a little, making it easier to get onto baby's hand.
Once the cuff is as long as you like, fasten off by working a final sl st into the mitten and fasten off  Weave in ends.


For the drawstring: Ch 60 (or as long as you like), fasten off. Tie an overhand knot at each end, weave through the eyelets and tie a bow


I created this pattern and tutorial, please link back to this original pattern or the video tutorial when sharing.  Thanks you

You may also like

Rumpled Ripple Rainbow Crochet Baby Afghan Pattern

Nursing Necklace Crochet Pattern and Tutorial


Monday, August 24, 2015

Homemade Pretzel Rolls Recipe


I love these pretzel rolls. They are great for hot dogs, bratwurst, ham and cheese sandwiches, hamburgers or any type of sandwich.  You can use this same dough to make regular soft pretzels as well.


Pretzel Rolls
1 1/2 cups warm water
2 1/4 tsp active dry yeast (or 1 packet)
1 T sugar
2 t salt
2 ounces butter or margarine, melted
4 1/2 - 5 cups all purpose flour
pretzel salt (optional)

Egg wash =1 egg + 1 T water beaten well

Alkaline bath = 8 cups of water + 1/2 cup baking soda at a gentle simmer

Mix the water, yeast, sugar, salt, butter and 2 cups of flour together to form a wet batter.  Slowly incorporate the remaining flour a little bit at a time to form a sticky dough.  knead 8-10 minutes until smooth and elastic.  This is a dense dough that will not spring back and will still be a bit sticky after kneading.  oil the dough ball with cooking oil and put the dough in a draft free warm place to rise until doubled.  Divide the dough into 100 gram dough balls (8-9 balls).  Shape into round or oblong rolls.

In a wide shallow sauce pan combine 8 cups of water and 1/2 cup baking soda.  Heat and bring to a gentle simmer.  One at a time dunk and submerge the rolls in the baking soda water for about 30 seconds.  Drain and transfer the rolls to a cookie sheet lined with parchment or silicone baking mat or grease the cookie sheet.  Cut superficial slashes in the top of the rolls.  Brush each roll with egg wash and sprinkle with pretzel salt if desired.  Bake at 450 degrees for 12-15 minutes until a rich mahogany brown all over.  Allow to cool slightly before slicing open.

Friday, July 10, 2015

Rumpled Ripple Rainbow Crochet Baby Afghan Pattern


After I finished my Rumpled Ripple Scarf I knew my next project would be to expand that pattern into an afghan size.  The pattern in essentially the same but for the afghan (and anything larger than a scarf) the foundation chain will need to be more repeats.


This pattern is so squishy and soft and I knew it would make a perfect baby blanket.  I chose an a rainbow of colors, making it as bright and colorful as possible.  This blanket is off to Sweden to the newest baby in our family.


This pattern uses US crochet terms.  I used a variety of acrylic worsted weight yarn. The colors I used
Red - Red Heart Soft Really Red
Orange - Red Heart Super Saver Pumpkin
Yellow- Lion Brand Vanna's Choice Radiant Yellow
Light Green - Lion Brand Vanna's Choice Radiant Lime
Dark Green - Lion Brand Vanna's Choice Kelley Green
Blue Red Heart Soft Teal
Purple - Stitch Studio by Nicole Story Book Lullaby Mulberry
The hook I used was size I.  This finished size of this blanket was about 38" square but your project may end up larger or smaller depending on your hook, yarn and tension.  It may be best to stitch of a swatch of several rows of 1-2 repeats then calculate how many repeats you want based on the finished size you are wanting.


Rumpled Ripples Rainbow Baby Afghan

Special Stitches


Cobble Pattern - alternating dc and sc (each segment of the cobble pattern will be 7 stitches long and start and end with double crochet)

Increase - sc, dc, sc all in the same st

Decrease (worked over 3 stitches)- insert hook into the st, yo, pull up a loop, skip the next st, insert hook into the next st, yo, pull up a loop, yo and pull through all three loops on the hook

Beginning of row decrease (worked over the first 2 stitches of each row starting with row 2)- insert hook into the st, yo and pull up a loop, yo and insert hook into the next st, yo and pull up a loop, yo and pull through 2 loops, yo and pull through all three loops on the hook - This stitch counts as a dc

End of row decrease (worked over the last 2 stitches of each row starting with row 2) - yo and insert the hook into the st, yo and pull up a loop, yo and pull through 2 loops, insert the hook into the next st, yo and pull up a loop, yo and pull through all three loops on the hook- This stitch counts as a dc


Pattern

Video tutorial of this stitch pattern can be found HERE

Foundation chain: ch multiples of 18 -1 (17, 35, 53, 71 etc)  For this afghan I did 9 repeats and my foundation chain was 161.

Row 1: dc in 3rd ch from hook (counts as the first dc in the cobble pattern), *work the cobble pattern for a total of 7 stitches up the side of the front mountain.  Increase in the next ch, work the cobble for a total of 7 stitches down the back side of the mountain, decrease over the next 3 stitches, repeat from * across.  Do not work the final decrease at the very end, just end with the 7 stitches down the back side of the last mountain. Ch 1 turn.

Row 2: Work beginning of row decrease over the first 2 stitches (counts as the first dc of the cobble pattern), *work the cobble pattern for 7 stitches up the front side of the mountain, increase, work cobble pattern for 7 stitches down the back side of the mountain, decrease over the next 3 st, repeat from * across.  Do not work the final decrease, instead work the end of row decrease over the last 2 stitches (will count as the last dc in the cobble pattern), ch 1 turn.

Row 3 and onward: Repeat row 2 changing colors as you like until your project is as long as  you like.  For my project I did 3 rows of each color before changing to the next color.  For the best results from this pattern I recommend using as least 2 colors.

To change colors:  

I find I get the best results if I change colors by finishing the last stitch of the row with the new color.  For this pattern that will be the End of Row Decrease stitch.  Work the stitch as normal but just before the final "yarn over and pull through all three loops on the hook" drop the working yarn to the back, and holding the new color yarn from the back work the final "yarn over and pull through all three loops on the hook" in the new yarn.  The tails from this color change will need to be woven into the work with a yarn needle at the end.

This pattern and these photos are my own work.  Please link back to this blog post when sharing.  Thank you!

You may also like
Rainbow Swirl Bonnet
Sunshine and Rainbow Bonnet
Simple and Sweet Baby Afghan

Thursday, June 11, 2015

5 Dairy Free Smoothie Recipes

A Vitamix found itself delivered to my front porch. I don't really know how or why, but it did. My loving husband (my sweet, kind, wonderful husband) ordered it without really telling me so it was a big surprise. Our stick blender died and our food processor was on it's last leg. Instead of buying another $100 blender or food processor that is just going to die on us in a couple years he went ahead and invested in a Vitamix.

 I saw the UPS truck pull up and I assumed my husband had ordered something from Amazon as he is fond of doing. But as the UPS driver emerged from his truck I saw that he was holding a large cardboard box with big bold letters spelling out "Vitamix". What a surprise! Initially I scoffed at the idea of spending so much on one kitchen appliance but I really do love it. I have been experimenting with it as much as possible. I've been making homemade almond milk, smoothies, pureed soups and sauces. I still have more I want to try, like peanut butter, hummus, and dairy free Nutella. I have collected 5 of my favorite smoothie recipes plus a bonuse vegetable juice. I love that I can make vegetable juice without a juicer in my Vitamix.


  Whole Fruit Smoothie - Orange, banana, blueberries and spinach


Mango and Coconut Smoothie - Mango, coconut cream, and coconut milk with a hint of lime


Strawberry Milkshake Smoothie - Strawberries, almond milk and vegan vanilla ice cream

Pina Colada Smoothie - Almond milk, coconut cream, pineapple and banana, garnish with shredded coconut


Shamrock Shake - Sweet creamy peppermint shake with a surprise ingredient

Monday, May 18, 2015

Edith's Baked Beans


Summer time is right around the corner and if you are looking for a new favorite recipe to take to cookouts and backyard parties, this just might be the thing you are looking for.  Everyone loves baked beans and these beans are so delicious and easy to put together.  Large meaty butter beans, bacon and kielbasa in a rich homemade sauce.  A great change from your usual baked beans made from small navy or great northern beans.

This recipe came from my grandmother's friend Edith.  I knew her when I was a small girl but my family has been enjoying this recipe since before I was born.  Try this recipe for a potluck or just with your family.  I know you will enjoy it :)


Ingredients:
3 (14 oz) cans butter beans, drained and rinsed
1/2 pound bacon, sliced, fried and drained
1 large onion, large dice
1 green bell pepper, large dice
1 jalapeno seeded and finely diced
1 (14 oz) can stewed tomatoes
3/4 cup ketchup
1 cup packed brown sugar
1 lb keilbasa sliced into 1/4 inch rounds

Tuesday, May 12, 2015

Flats And Handwashing Challenge ~ Day 2 ~ Diaper Stash


Here is my diaper stash!  GMD large cotton birdseye flats, Thirsties Duo Wrap covers and Blueberry Coverall covers. :)

Monday, May 11, 2015

Flats and Handwashing Challenge: Day 1 - Why I Am Taking The Challenge


Today is the day.  The Flats and Handwashing Challenge starts today.

I really wanted to do this challenge last year but life was very overwhelming at the time.  I was a new mom with a 6 month old and although I was 6 months post partum I was still struggling to recover physically.  The idea of flats seems impossible.

The whole idea of cloth diapers seemed impossible when I first started learning about them.  When you are pregnant or preparing for a baby there are several topics that can overwhelm you but cloth diapers is one of the biggest.  Seriously, I was more worried about cloth diapers than I was about breastfeeding (and both ended up working out well for us, thank God!)  I had read so much and watched so many videos about cloth diapers and I never felt like I was making any headway, I still felt so confused and had no idea where to start.  I watched one video which broke everything down in the simplest terms.  I am grateful for that video because it really helped things start to fall into place in terms of understanding how to use cloth diapers but there was one single comment on that video that put me off flat diapers.  In the video the person was telling about all of the different types of cloth diapers.  Prefolds, pockets, all in ones and......flats, but nobody uses those.  I remember that off hand comment all the time as I am folding my flats, or whenever I tell someone I use flats and they tell me they use them (and love them) too.  Lots of people use flats and those who use them love them!

Now one year later, with one year more of mommy experience (but still feeling lost and overwhelmed a lot of the time) I am taking on this challenge.  I already use flats.  They are my primary diaper.  My Little One grew so fast and furious in the beginning that I had to size up her prefolds 3 times in the first 6 months.  I went online to buy toddler size (TODDLER SIZE!!) prefolds when I decided to give flats a try.  I ordered a couple and started using them.  I was able to get a perfect fit around her chunky thighs and I fell in love :)

I guess I am sort of cheating on this challenge.  I am all gung-ho and feeling confident but would I be if this was my first attempt at using flats?  I already use flats and I already hang to dry so the only challenging part of the challenge is the handwashing (which I admit, is a big part).

So what a difference a year makes.  Flats no longer seem so daunting, they seem like the easy part.

I think the challenge was meant to target people who never used cloth before, or had limited incomes.  Showing how accessible cloth diapers for someone with no experience and/or no budget for fancy fluff is an important message but when I was first starting with flats I ate up all the information about using flat diapers that was now available because of this challenge.  If not for this challenge I am afraid that the only information out there would be similar to the "nobody uses flats" message
I had heard.  I am grateful to the people who took this challenge before me, and who documented it.  I am taking the challenge this year because I want to add my perspective to the collection of other people who have documented their experience with the challenge.  I want there to be so much information out there that the "nobody uses flats" message is not as powerful to anyone else as it was for me.


******My cloth diaper favorites *******

Wednesday, May 6, 2015

I'm Taking the Flats and Handwashing Challenge!

Starting next Monday I will be participating in the Flats and Handwashing Challenge.  I will be documenting all throughout the week.  So be sure to stop by and hear me talk about poop and pee!  lol!

Monday, April 13, 2015

Homemade Mayonnaise Recipe ~ Tips for Perfectly Thick and Creamy Mayo!

The first time I made homemade mayonnaise it turned out perfectly; soft and velvety, creamy and smooth.  The second time I made homemade mayonnaise it turned out perfect as well.  The third time I made it.... disaster!  The emulsion broke.  The egg and oil separated into a runny and soupy mess.  After that I had some success and some failures.  It really pained me to waste the ingredients and it pained me more to continue to add additional egg yolks in the hopes of saving the mess to have it still fail. I experimented with all the variables and still only had about a 40% success rate.  It was only after I started experimenting with different machines did I get a really consistent mayonnaise.  The stand mixer and food processor usually gave me soupy mayo and my immersion blender most often gave me thick creamy mayo.  I was just getting the hang of making mayonnaise when my stick blender burned up.  I thought I was going to have to revert to buying the jarred mayo again but I was able to get my smaller hand mixer to work.  I would never guess that my cheap $20 hand mixer would work better than my large powerful Kitchen Aid stand mixer, but in this case it does.  The secret to perfect mayonnaise every time is to make sure your vessel is not too large.  The ingredients do not have enough contact with the beaters or blades to get a proper emulsification.  Using a mini food processor, an immersion blender, or a small hand mixer with a small bowl will give you the best result.


Ingredients
1 egg yolk
1 cup oil
1 T dijon mustard (or to taste)
1T lemon juice or white wine vinegar (or to taste)
salt and pepper

Wednesday, April 1, 2015

Halushka Recipe ~ Braised Cabbage and Dumplings


This recipe is very popular in Pennsylvania where my family is from.  There are slightly different names and slightly different recipes but basically halushka or haluski is a braised cabbage dish with either noodles, pasta or dumplings and sometimes bacon, ham or smoked sausage added.  It is sometimes a side dish but most often it's a main dish.  It is a common potluck dish.

In my version I use bacon and drippings and homemade dumplings.  Most recipes will call for cooked wide egg noodles, kluski noodles or bite size pasta like farfalle (bowties).  Instead, I like to make dumplings because they are delicious and because its more likely that I'll have a cup of flour and an egg on hand than a bag of noodles.  Either way it is a quick, easy, inexpensive and delicious dinner.

If you want to omit the bacon you can substitute butter for a vegetarian version or use olive oil and an egg-free pasta for a vegan friendly version.

I hope you give this recipe and try and I hope that you love it as much as my family does.


Ingredients:
1 medium cabbage, quartered, cored and sliced into 1/4" ribbons (about 10 cups)
2 cups chopped onions
1 cup matchstick carrots (or 3/4 cup grated carrot)
1/2 pound bacon sliced across in 1/2 inch slices
salt and pepper

Dumplings
1 cup all purpose flour
1/2 tsp baking POWDER
1 egg
2-3 TBSP cool water

Monday, March 9, 2015

Rumpled Ripple Scarf Pattern


Some people call it zig zag, some people call it ripple or wave, the new trendy name is chevron.  Whatever you call it, its a classic look that I just love.  Most often ripple patterns are made from simple basic stitches such as single crochet or double crochet so they are a great pattern for beginners that are ready for something more than row after row of the same stitch.  Some ripple patterns take motifs from other classic patterns, such as granny ripples or V stitch ripples.  This pattern is borrowing from the cobble stitch pattern.


The cobble stitch (sometimes called griddle stitch) is simply alternating between single crochet and double crochet.  As you come back again with row two you put double crochets into the single crochet and single crochets into the double crochet.  The resulting stitch is thick, textured, and solid.


I wanted to incorporate the texture of the cobble stitch into a ripple pattern for a scarf.  I love the result.  The scarf is solid, with no holes.  Textured but not taking away from the zig zag-ing chevrons.  A simple repeat of a single row so it works up quickly and easily.

This pattern uses US crochet terms.  I used Vanna's Choice Lion Brand yarn,  a medium (#4) worsted weight yarn and size I hook.  Please let me know if you have any questions about this pattern.


Cobble Stitch Ripple Pattern


Special Stitches


Cobble Pattern - alternating dc and sc (each segment of the cobble pattern will be 7 stitches long and start and end with double crochet.

Increase - sc, dc, sc all in the same st

Decrease (worked over 3 stitches)- insert hook into the st, yo, pull up a loop, skip the next st, insert hook into the next st, yo, pull up a loop, yo and pull through all three loops on the hook

Beginning of row decrease (worked over the first 2 stitches of each row starting with row 2)- insert hook into the st, yo and pull up a loop, yo and insert hook into the next st, yo and pull up a loop, yo and pull through 2 loops, yo and pull through all three loops on the hook - This stitch counts as a dc

End of row decrease (worked over the last 2 stitches of each row starting with row 2) - yo and insert the hook into the st, yo and pull up a loop, yo and pull through 2 loops, insert the hook into the next st, yo and pull up a loop, yo and pull through all three loops on the hook- This stitch counts as a dc


Pattern


Foundation chain: ch multiples of 18 -1 (17, 35, 53, 71 etc)  For my scarf I did ch 35 (2 repeats)

Row 1: dc in 3rd ch from hook (counts as the first dc in the cobble pattern), *work the cobble pattern for a total of 7 stitches up the side of the front mountain.  Increase in the next ch, work the cobble for a total of 7 stitches down the back side of the mountain, decrease over the next 3 stitches, repeat from * across.  Do not work the final decrease at the very end, just end with the 7 stitches down the back side of the last mountain. Ch 1 turn.

Row 2: Work beginning of row decrease over the first 2 stitches (counts as the first dc of the cobble pattern), *work the cobble pattern for 7 stitches up the front side of the mountain, increase, work cobble pattern for 7 stitches down the back side of the mountain, decrease over the next 3 st, repeat from * across.  Do not work the final decrease, instead work the end of row decrease over the last 2 stitches (will count as the last dc in the cobble pattern) ch 1 turn.

Row 3 and onward: Repeat row 2 changing colors as you like until your project is as long as  you like.  For my project I did 3 rows of each color before changing to the other color.  For the best results from this pattern I recommend using as least 2 colors.

To change colors:  

I find I get the best results if I change colors by finishing the last stitch of the row with the new color.  For this pattern that will be the End of Row Decrease stitch.  Work the stitch as normal but just before the final "yarn over and pull through all three loops on the hook" drop the working yarn to the back, and holding the new color yarn from the back work the final "yarn over and pull through all three loops on the hook" in the new yarn.  The tails from this color change will need to be woven into the work with a yarn needle at the end.


This pattern and video tutorial is my own creation.  Please link back to this original blog post or video when sharing.

Sunday, February 15, 2015

Whole Wheat Hamburger and Hot Dog Buns ~ (Dairy Free)


Here is my favorite recipe for hamburger and hot dog buns.  I don't always have luck when I make homemade bread but this recipe has never failed me.  These buns are soft with a delicious olive oil flavor.  They are very simple to put together.  I usually don't proof my yeast, is not necessary unless you think your yeast is old or dead.  Also, this recipe only requires a single rise so its only about 20 minutes of hands on time to make.  You can add an egg wash and top with sesame seeds if desired.


Ingredients:
1 cup warm water
1 package of yeast (2 1/4 teaspoons)
2 TBSP honey or sugar
1 tsp salt
1/4 cup olive oil
1 egg
2 cups whole wheat flour
1 1/2 - 2 cups all purpose flour


Mix the first six ingredients.  Add the whole wheat flour and mix.  Knead in the all purpose flour until the dough is no longer sticky and is smooth and elasstic, about 8 minutes.  Form into 8 buns and place them on a silicone mat lined cookie sheet.  Let rise in a warm steamy area* for about an hour or so.  Bake at 350 F for 15-20 minutes.

*I create a warm steamy environment for rising dough in my microwave.  Fill 2-3 little shallow dishes with water and microwave for 3 minutes or so until the water in the dishes starts to boil and steam. Working quickly so all the steam doesn't escape, put the formed loaves in the microwave to rise.

Tuesday, February 10, 2015

Spinach Avocado Pasta


I love this recipe. It is delicious, quick and made with simple good-for-you ingredients. My family loves it.  It is a basic recipe that is so versatile.  I usually serve it warm for dinner then I have the leftovers cold for lunch the next day.  Its good both ways.  You can add diced chicken, cherry tomatoes, Parmesan cheese, or all three.


Ingredients (4 servings)
1/2 pound of frozen spinach, thaw and squeeze out excess moisture
2 TBSP lemon juice or to taste
1 avocado
1/2 pound whole wheat spiral pasta (or any pasta you like)
Salt and pepper to taste
Olive oil to taste *optional*

Cook the pasta is salted water according to package directions. In a food processor, blend together the spinach, avocado, lemon juice and salt and pepper. Add a couple tablespoons of olive oil if desired. Stir spinach and avocado mixture into cooked and drained pasta. Serve warm or cold.

Monday, January 26, 2015

How to Make Rose Beads


I had a bunch of dried roses collecting dust on my mantel.  They were given to me years ago.  I used the petals from these dried flowers to make these rose beads.

These were very simple to make and the beads are very fragrant and beautiful.  I love the natural texture and earthy color.

The beads will shrink as they dry so be sure to make the beads larger than you want your finished beads, and make the whole larger as well.

If your beads seem crumbly or crack easily as you are forming them, you may need to add a bit more water.  I just dip my finger tip into a bowl of water and use that small drop of water to smooth over any rough or cracking areas.


Thanks so much for stopping by.  If you are making rose beads yourself, leave me a comment.  I would love to know what you plan to make from them.

Tuesday, January 20, 2015

Sweet and Sour Braised Red Cabbage Recipe

This braised red cabbage side is delicious and so simple to make.  It goes great with all sorts of German or Pennsylvania Dutch meals.  Pork chops, bratwurst, kielbasa, but also roast chicken, chicken fried steak, just about anything.


I like to add star anise to my red cabbage.  You can also use caraway seeds, fennel seeds, or omit them entirely.  You can also adjust the sweet and sour flavors to suit your preferences.  I like mine to be a bit more sour than sweet.


For this recipe I used:
1 medium red cabbage, quartered, cored and sliced into 1/4 inch ribbons
1 large yellow onion, sliced into 1/4 inch rings or half moons
1 large tart apple, peeled, cored, and sliced
6 TBSP apple cider vinegar or to taste
3-4 TBSP sugar or to taste
1/2 - 1 star anise pod (optional)
1-2 TBSP canola oil
salt and pepper to taste

In a large stock pot, heat the canola oil.  Add the onions, salt and pepper and fry for 2-3 minutes.  Add the cabbage and fry for about 5 minutes.  Deglaze the pan with about a cup of water.  Add the apples, vinegar, sugar, star anise.  Stir to combine, cover and simmer for 30 minutes or until the cabbage is as tender as you like it.

About Me

My photo
Welcome to my little corner of the web. I love to share things I make and ideas I have. I hope you enjoy!